


Keep Your Cedar Sauna Looking New With These Simple Maintenance Habits
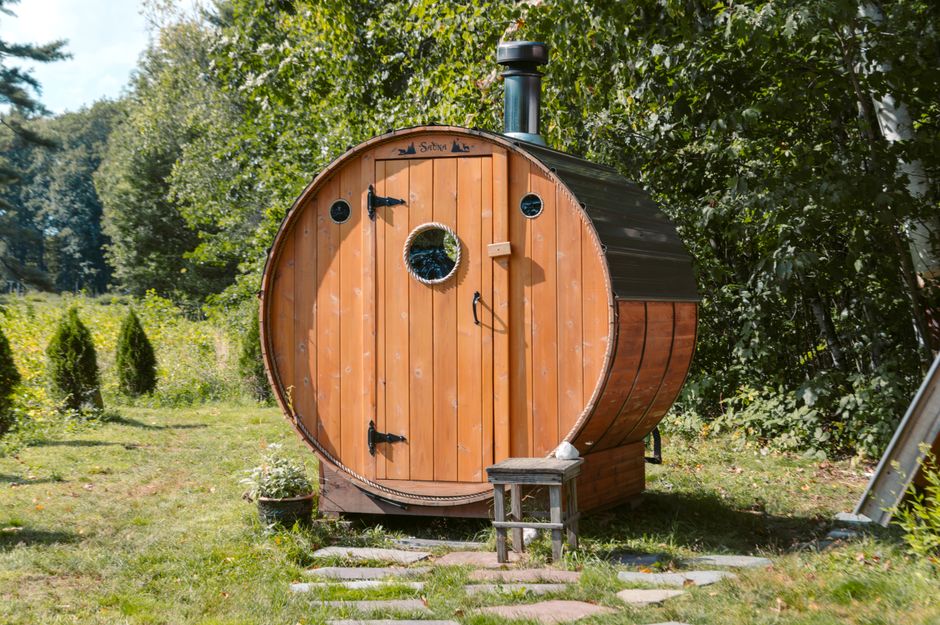
A cedar sauna is one of the most rewarding additions you can make to your outdoor living space. The warm, reddish grain, the unmistakable aroma, the way the wood holds heat and feels smooth under your hands; it is an experience that only deepens with time. But only if you keep up with the wood. Cedar is a softwood with open pores that make it vulnerable to damage from inappropriate cleaning methods, and harsh chemicals or aggressive scrubbing can cause raised grain, splintering, or unsightly color blotching that permanently mars the surface.
The good news is that cedar sauna maintenance is less complicated than most owners expect. With basic care, literally just leaving the door open after use, clear cedar saunas last 20 to 30 years in residential use, and when you calculate the per-year cost over that lifespan, cedar often costs less annually than budget alternatives that need replacing after 10 to 15 years. That math only works in your favor if you follow a consistent routine from day one. This guide walks you through every habit that matters, from the 60-second post-session wipe-down to the annual exterior refresh, so your investment stays as beautiful as the day it was installed.
Key Takeaways
- Cedar's natural chemistry does the heavy lifting: Western red cedar contains thujaplicins, a type of natural fungicide that is toxic to decay-causing fungi, preventing the wood from rotting, but regular cleaning preserves those oils rather than stripping them.
- After every session, wipe it down: After use, wipe down all benches, backrests, walls, and the door with a damp cloth while the sauna is still warm, which removes sweat and oils before they can set into the wood. This single habit prevents 80% of maintenance problems down the road.
- Ventilation is non-negotiable: Ventilation is the single most important factor in preventing mold. Leave the door open for at least 30 minutes after every session to allow the interior to dry completely.
- Never use varnish, polyurethane, or bleach inside: Cedar should never be sealed with varnish, polyurethane, or synthetic finishes, as these products trap moisture, which can lead to cracking, blistering, and long-term damage.
- Sand once a year, treat the exterior every two to three years: Annual light sanding is recommended for heavily used saunas, while less frequent use may require sanding only every two to three years.
Quick-Start Prioritization Framework
Not sure where to begin? Use this table to find the highest-impact tasks for your situation.
| Maintenance Task | Best For | Effort Level | How Often |
|---|---|---|---|
| Post-session wipe-down | All owners | Low | After every use |
| Door-open drying phase | All owners | Low | After every use |
| Interior wash (mild soap + water) | Regular users | Low | Weekly |
| Deep scrub with sauna-safe cleaner | Heavy users | Medium | Monthly |
| Bench sanding (120-220 grit) | All owners | Low | Annually |
| Interior oil treatment | Optional/personal preference | Medium | Every 1-2 years |
| Exterior UV-protective stain | Outdoor sauna owners | Medium | Every 2-3 years |
| Full structural inspection | Outdoor sauna owners | Low | Twice per year |
Start here if you're:
- A new owner: Begin with the post-session wipe-down and ventilation habit. Those two steps alone will protect your cedar for years before more involved care is ever needed.
- A regular user (3 to 5 sessions per week): Add a weekly interior wash and plan your first annual bench sand for the 12-month mark.
- An outdoor sauna owner: Prioritize exterior staining in your first spring after installation, then revisit every two to three years depending on sun and weather exposure.
Step 1, Build the After-Every-Session Habit
Every great maintenance routine starts with what happens in the first five minutes after your last session ends.
Wipe Down While the Wood Is Still Warm
During your sauna session, the single most important preventative measure is using towels or dedicated sauna seat covers on all bench surfaces, as this barrier absorbs sweat and oils before they can penetrate the wood, dramatically reducing staining and bacterial growth. Once your session is over, keep that momentum going. At the end of your sauna sessions use a damp cloth to wipe down benches, backrests, and walls where skin contact occurs. This quick light cleaning removes sweat and superficial dirt before it can cause stains.
Work from top to bottom, using gentle circular motions, and pay special attention to the underside of benches. Remember to wash the underside of the benches because it is a favorable breeding ground for bacteria and mold. A single dry microfiber cloth or a soft cotton towel is all you need. This entire process should take under two minutes.
Pro Tip: Keep a dedicated sauna brush and small bucket inside the room. The last person out dips the brush in the water bucket (plain water) and does a quick scrubbing of the benches, walls, and backrests. This 30 to 60 second ritual will keep your sauna looking great for years.
Open the Door and Let It Breathe
Once you have wiped the surfaces down, leave the door open. Every sauna session should end with a deliberate "drying phase" that removes moisture before spores can activate. Ventilate right after use with the door open for around 30 minutes and duckboards propped, and after cleaning, run the heater for about 30 minutes to fully dry the room.
The key is creating cross-ventilation: one low intake vent near the heater draws in fresh air while a higher exhaust vent on the opposite wall or ceiling expels humid air, keeping air circulating throughout every nook and cranny of the cabin. If you own a Dundalk LeisureCraft cedar sauna, the barrel and cabin designs are built with this cross-ventilation principle in mind, making the drying phase effortless with the right vent positioning.
Step 2, Establish a Weekly Interior Cleaning Routine
The daily wipe-down handles surface moisture. Your weekly clean handles the deeper grime that accumulates over multiple sessions.
Choosing the Right Cleaning Solution
Skip harsh household cleaners such as bleach, ammonia, or strong degreasers. These chemicals can damage the wood fibers, discolor the surface, and leave residues that may off-gas when heated. Stick with gentle, sauna-safe cleaners or simple soap-and-water solutions instead.
For a reliable DIY formula, mix a gentle solution of one part white vinegar to three parts warm water, or a few drops of mild natural soap in warm water, or use a specialist sauna cleaner according to the manufacturer's instructions. A dedicated sauna cleaner is specifically formulated for cedar interiors and can be used straight or diluted. When choosing any commercial product, look for specific label phrases like "for sauna benches or softwood interior," "pH-neutral," "chlorine-free," and "no wax/oil buildup," as these indicators help ensure the product will not damage cedar's delicate structure or create slippery, unsafe surfaces.
How to Scrub Without Damaging the Grain
Dampen your cloth or sponge in the cleaning solution and wring it out well so it is damp, not dripping wet. Wipe benches, walls, and floors using gentle, circular motions, working systematically from top to bottom, and pay special attention to bench surfaces, backrests, headrests, the door interior and handle, areas around the heater, and floorboards.
In my experience, the most common mistake is over-wetting the wood. It is critical to avoid oversaturating the wood, as excess moisture can cause warping and damage. A damp cloth is plenty; you are not hosing down a deck, you are refreshing a fine wood interior.

Tackling Stubborn Stains
Sweat marks and dark spots will eventually appear on the bench tops, especially around areas of frequent skin contact. For those spots, make a paste with baking soda and a little water, spread it over the stain, let it sit for about 15 minutes, then lightly scrub with a soft brush and wipe away the residue with a damp cloth, allowing the wood to dry completely.
For persistent odors, fill a spray bottle with diluted white vinegar, mist the benches and wall surfaces, let the solution sit for a few minutes, then wipe with a clean cloth. If stains have set deeply into the grain, light sanding (covered in Step 4) is a more effective solution than repeated scrubbing.
Step 3, Conduct Monthly and Seasonal Deep Cleans
For home saunas that get a lot of use, plan on a more thorough deep clean at least once a month, focusing on benches, floors, and high-touch areas.
The Monthly Deep Clean Checklist
- Sweep or vacuum the floor and all corners under the benches.
- Wash the floor surface with warm water and a sauna-safe cleaner.
- Sanitize benches and walls with a diluted vinegar or hydrogen peroxide solution.
- Wipe door hardware and window glass.
- Inspect the underside of all bench boards for any early signs of discoloration or moisture damage.
- Prop duckboards off the floor after cleaning to allow air to circulate underneath.
To sanitize the sauna and address any remaining bacteria or mold spores, mix equal parts of water and vinegar or hydrogen peroxide in a spray bottle, lightly mist the interior surfaces, and allow the solution to sit for a few minutes before wiping dry with a clean cloth.
The Twice-Yearly Seasonal Inspection
Twice a year, ideally in spring and fall, your sauna benefits from a more thorough deep cleaning and maintenance session, which is the moment to address any accumulated wear, refresh the wood surfaces, and prepare for the season ahead.
Regularly check the floor, corners, and lower areas of the sauna for any lingering moisture buildup, and dry these spots promptly to help prevent mold or water damage. It is also important to inspect the cedar periodically for signs of wear, mildew, or wood deterioration so that any maintenance issues can be addressed before they worsen.
Pro Tip: Use a hygrometer to check humidity levels in your sauna, aiming for 30 to 50 percent humidity when the sauna is not in use. If your readings are consistently above that range, improve post-session ventilation or add a small timer-controlled vent fan.
Step 4, Annual Interior Refresh: Sanding and Optional Oil Treatment
Once a year, dedicate an hour to renewing the surfaces your body actually touches. This is where cedar earns its reputation for longevity.
How to Sand Sauna Benches
Your sauna wood will naturally darken over time, and that patina is heat and use working on the wood the way they are supposed to. If you want the original lighter color back, a light pass with 150 to 180 grit sandpaper across the benches every few years brings it most of the way home and releases the cedar aroma at the same time.
For the annual touch-up, lightly sand once per year using 120 to 220 grit sandpaper, or as needed for stains, then apply a sauna-safe oil or finish to maintain moisture resistance. Always sand with the grain, never across it, and wipe away all dust with a damp cloth before any treatment is applied.
Should You Oil the Interior?
Cedar sauna benches do not need to be coated with any additional oils, waxes, or finishes, but a light sauna-specific oil can help maintain appearance and reduce sweat absorption. If you choose to oil, paraffin oil is available almost everywhere and works for most sauna woods. Apply a thin layer with a brush or lint-free cloth, allow it to absorb for 30 minutes, then buff away any excess. Apply sauna-specific wood oil every one to two years to replenish the natural oils that can be lost over time, which helps maintain the wood's color, moisture resistance, and overall condition.
The one product category to avoid permanently: cedar should never be sealed with varnish, polyurethane, or synthetic finishes, as these products trap moisture and can lead to cracking, blistering, and long-term damage.
Step 5, Protecting the Exterior for Long-Term Beauty
If your sauna lives outdoors, the exterior cedar faces a completely different challenge from the interior. Sun, rain, and seasonal temperature swings will age unprotected cedar quickly.

Understanding Natural Weathering vs. Treated Cedar
Untreated outdoor wood will gradually weather to a silvery-gray patina as UV light breaks down the surface lignin. Some owners love this weathered look; it is authentic and completely maintenance-free. Others prefer to preserve the warm, rich color of new wood. Both choices are valid; the decision comes down to your aesthetic preference.
Western red cedar produces thujaplicin, a defense mechanism against rot and fungus, and this natural fungicide enables even a dead tree to be a valuable part of the forest. Properly finished, western red cedar products will last for decades, even in harsh environments. Based on this, the structural integrity of your sauna is not at risk either way, the treatment decision is about appearance.
Applying an Exterior Finish
If you want to preserve the warm cedar tone, use a penetrating exterior oil with UV protection. LeisureCraft recommends Livos Alis in four shades through your dealer, but any quality penetrating, non-film stain for outdoor wood works the same way.
Always apply two thin coats rather than one thick one for maximum protection, and prep by cleaning and lightly sanding. Apply in dry weather between 50 and 80 degrees Fahrenheit when wood moisture is under 15 percent.
UV-absorbing pigments and moisture-repellent ingredients work together to slow graying, fading, and warping, helping your sauna exterior maintain richer color, cleaner lines, and a well-kept appearance despite constant sun, rain, and humidity exposure.
Re-oil or re-stain the exterior if the surface is showing wear, roughly every two to three years for cedar in most climates. When water stops beading on the surface and starts soaking in, that is your cue to reapply.
Pro Tip: There is no fixed schedule for recoating, apply when the finish looks dull or the color fades, roughly every couple of years depending on sun and exposure. Because penetrating oils soak in rather than forming a film, recoating later requires no sanding, just clean the surface and brush on a fresh coat.
Common Cedar Sauna Maintenance Mistakes to Avoid
Even well-intentioned owners can make choices that shorten their sauna's life. Here are the patterns to watch for.
Using Household Cleaners
Multi-purpose kitchen and bathroom cleaners, ammonia-based products, and chlorine bleach all belong outside the sauna. Products containing bleach can permanently lighten patches of cedar or weaken surface fibers, especially on frequently contacted areas like sauna benches and backrests where people sit directly on the wood surface. Stick to mild natural soap and water, diluted white vinegar, or a cleaner labeled specifically for sauna interiors.
Skipping the Ventilation Step
Mold thrives in damp and humid environments, sprouting up year-round, and a well-ventilated sauna denies the fungus these conducive conditions by preventing moisture accumulation and stagnant air. Skipping the post-session airing is the most common reason sauna owners end up with mold or persistent odors months after purchase.
Leaving Wet Towels Inside
Keeping towels and mats clean is one of the simplest yet most effective ways to prevent mold in your sauna. Damp fabrics are a breeding ground for mold, especially if left crumpled or hanging on hooks. Always use clean towels for each session, and hang them spread out afterward to dry fully.
Sealing the Interior Wood
One of the most counterintuitive yet critical rules is that you want the wood untreated on interior surfaces. Sauna wood needs to breathe easily, absorbing moisture during use and releasing it naturally during drying. Coatings trap humidity beneath the surface, creating a hidden environment where mold thrives.
If you are looking to browse cedar sauna options or pair your sauna with a complementary cold plunge tub or outdoor shower, Domaform Outdoor carries a curated selection of Dundalk LeisureCraft products alongside the accessories you need to care for them.
Frequently Asked Questions
How often should I clean the interior of my cedar sauna?
Wipe benches and walls with a damp cloth after every session to remove sweat and moisture, and do a weekly gentle clean with mild soap or a sauna-safe cleaner to prevent stains and odors without harming wood. For saunas used three or more times per week, add a full deep clean once a month that includes the floor, underside of benches, and door hardware.
Can I use bleach to remove mold from cedar sauna wood?
No. The one rule is never to use bleach, ammonia, or harsh disinfectants; they can grey the cedar and are not something you want to breathe once the room heats up. Instead, use a diluted white vinegar or hydrogen peroxide solution, which sanitizes effectively without damaging cedar fibers or leaving harmful residues.
Does cedar sauna wood need to be oiled or sealed?
This is largely an aesthetic and maintenance question rather than a structural one. Cedar and thermally modified woods are naturally resistant to rot and decay and will last for years even without exterior treatment. For the interior, avoid any film-forming sealant. A breathable sauna-safe oil on benches is optional and may help with appearance, but the interior cedar will perform well untreated with consistent cleaning and ventilation.
How do I stop my cedar sauna from turning gray on the outside?
Like any wood, the exterior of cedar is subject to an oxidation reaction when directly exposed to sunlight and oxygen, and when cedar is left in the sun it will bleach out its natural red color, causing it to turn a light grey color. To prevent this, apply a quality penetrating exterior oil or stain with UV inhibitors before installation, and reapply every two to three years. If your cedar has already grayed, light sanding before reapplication will restore most of the warm tone.
How long will a well-maintained cedar sauna last?
For premium longevity and aromatic experience, western red cedar excels across all applications with a 30 to 40 year lifespan. A well-maintained western red cedar sauna can last decades without chemical treatment, outperforming virtually every alternative wood in total service life. The key variables are ventilation after each use, avoiding harsh cleaning chemicals, and protecting the exterior from UV exposure.
Sources
- Sauna Maintenance: A Year-Round Care Guide, LeisureCraft. https://leisurecraft.com/blog/outdoor-sauna-maintenance-guide
- What is Best to Use to Preserve the Wood on the Outside of a Sauna?, Commonplace. https://trycommonplace.com/blog/what-is-best-to-use-to-preserve-the-wood-on-the-outside-of-a-sauna/
- About Western Red Cedar, Naturally Wood / Duffield Timber. https://www.naturallywood.com/species/western-red-cedar/ and https://duffieldtimber.com/the-workbench/buyers-guides/western-red-cedar-guide
- Choosing the Right Wood for Sauna Installations, Fluidra. https://www.fluidra.com/commercial-solutions/inspiration/blog/wood-for-sauna/
- Wood Treatment for Saunas, Woodcare Guide. https://woodcare.guide/blogs/wood-treatment-indoors/saunan-kasittely